We know that buying a house is only the start of making a house a home. The festive holiday tradition of making decorated sugar cookies transforms your kitchen into a creative workshop filled with laughter and the sweet aroma of baking. Families and friends gather together to roll out the cookie dough and cut the shapes. Then, the anticipation builds as the cookies bake to perfection, filling the air with the irresistible scent of warm vanilla. Once cooled, the real magic begins as the decorating extravaganza takes center stage. Bowls of vibrant royal icing, sprinkles, and icing sugar turn these plain cookies into edible masterpieces.
The process can be joyful and collaborative, with each participant adding their personal touch to create a colorful array of holiday delights. While making cute royal iced sugar cookies can seem impossible, we think this simple, versatile recipe will help you make cookies that keep their shape and will surely be a hit at your next holiday gathering.
Easy Sugar Cookies
Ingredients
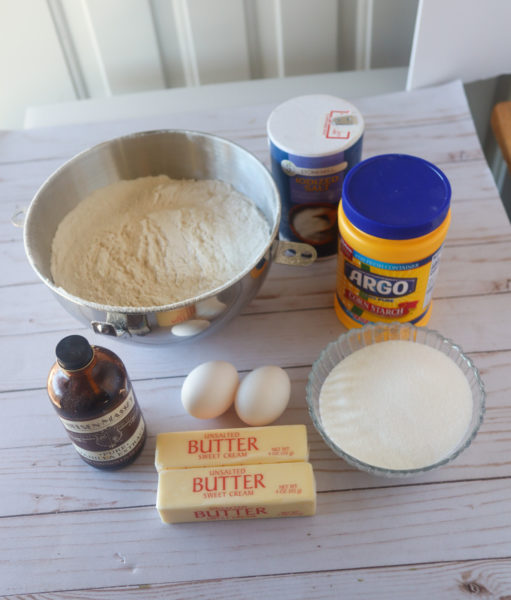 Butter – We recommend using unsalted butter in this recipe so you can have more control over the final taste. You can also use cold butter—In this recipe, we suggest taking the butter out of the fridge as you collect your ingredients. When you’re ready to start the dough, just cut your butter into small slices or cubes so it will mix up more easily.
Sugar – Your household granulated sugar will work perfectly in this step and give that classic flavor you expect from a sugar cookie.
Eggs – These help the dough bind together. We typically remove the eggs from the fridge when we gather our supplies and add them when ready.
Vanilla – Cookies can be flavored however you prefer – vanilla, almond, and lemon are very popular flavors. Even if adding an additional flavor, we typically recommend using at least some vanilla to give depth to the flavor. You can use those bottles of homemade vanilla you’ve gotten as gifts or splurge for a high-quality vanilla. In our experience, we found that Nielsen-Massey Madagascar Bourbon Pure Vanilla Extract has an excellent flavor in these cookies and is worth the splurge! We love to mix this with some almond extract for that extra special flavor.
Flour – All-purpose flour, or as it’s more commonly known – plain flour, is what you’ll want to use. We also suggest that you sift your flour. This will help keep the cookies from getting too clumpy and stay light and airy.
Corn Starch – This is the secret weapon in this recipe. If you want your cookies to match the shape you cut them into, do not skip this ingredient! The right combination of flour and cornstarch will keep your cookies tasty and shapely.
Salt – Part of the reason we recommend using unsalted butter is so you have more control over how much salt you include in the recipe. If you do not have unsalted butter on hand, reduce the amount of salt you add in this step by a little more than half.
Mixing Your Cookie Batter
Mix your sifted flour, cornstarch, and salt in a separate bowl, stir until the ingredients are well incorporated, and set aside. Then, take your cubed butter and sugar and beat them together in your mixer until they’re well combined. You don’t have to go crazy, but you’ll want to scrape the butter off the beater a few times to blend the butter and sugar well. We aren’t going for a super smooth texture here- just beat until mixed thoroughly. You’ll then add your eggs and flavorings and continue mixing. Because we are using colder butter, this won’t be smooth, but again – mix until it is well combined.
Next, add the flour mixture to the mixer that contains your butter, sugar, eggs, and flavoring. Turn the mixer to low-medium—We recommend covering your mixing bowl with a hand towel to minimize mess. The dough will start to come together. You will know it’s ready when it pulls away from the sides of the bowl, leaving you with a cohesive, soft, and squishy consistency.
Rolling and Cutting Your Cookies
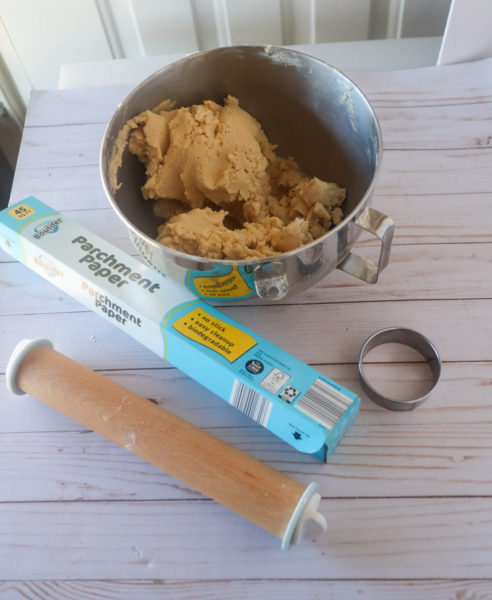 One of the best parts of using chilled butter in this recipe is that once your dough is mixed, you can immediately roll it out and start cutting your cookies. Chilling this dough in the fridge is only necessary if you want to save it for another time. You can keep it in the fridge for 2-4 days or freeze it for up to two months – just make sure to allow your dough to warm up when you take it out so you can roll it out smoothly.
A great tip here is to use parchment paper on your counter and add a little flour on top. This will keep the dough from sticking to the paper, and once your cookies are cut, you can lift the paper to grab your shape without it stretching. Another pro tip is to get an adjustable rolling pin. These have different-sized discs you can screw onto the ends to help ensure you roll your dough out to an even thickness. We prefer ¼ inch, so you can get a cookie that’s thick enough to stay together but thin enough to get the most cookies from your dough.
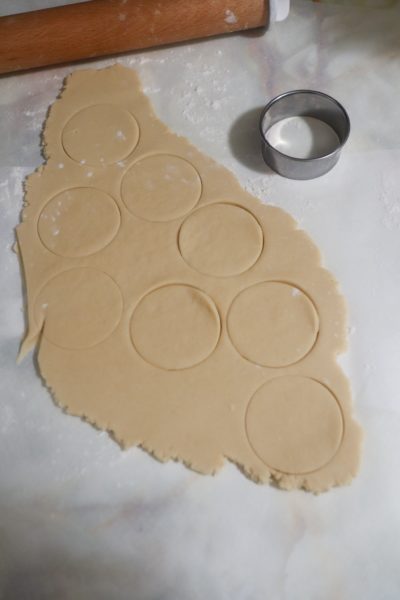 To keep these holiday cookies simple, we used one round cookie cutter. If you do not have a cookie cutter, feel free to get creative—You could use a glass or anything hollow and circular for cutting purposes. After stamping our shapes, we peeled the extra dough away and re-rolled it each time to make more.
The next best tip we have for making easy sugar cookies is to use silicone mats on your cookie sheets. If you’ve never used them before, these are a game-changer! There is no need for spraying – just plop your shapes down on the mats and get those cookies in the oven.
Place your cookie sheets on the middle rack in the oven at 375°F for 11-12 mins. Keep an eye on your cookies while baking to ensure they don’t get too overdone—You don’t want to overbake. If the bottoms are too golden brown, you have baked for too long. You want the cookie to ‘finish’ its baking process as it cools, so your sugar cookies aren’t too hard or crispy (unless that’s what you like). Remove them from the oven and place them onto drying racks for cooling.
Icing Your Cookies
Once your cookies have cooled, it’s time to move on to icing! This is where things tend to get tricky for folks. Using royal icing can seem intimidating and can take a little practice – but we hope that with a few tips and tricks, you can give it a try and become a pro!
Ingredients
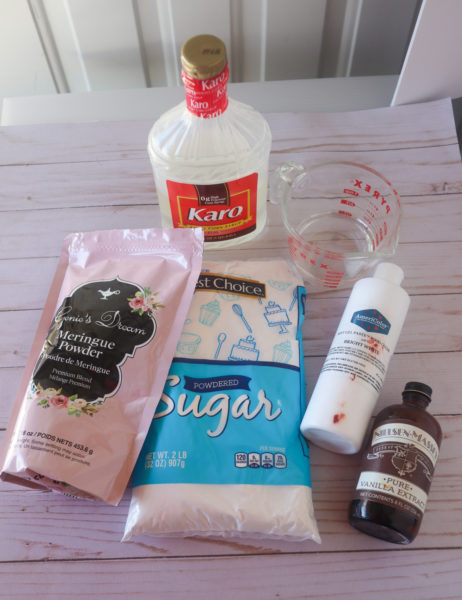 Powdered Sugar – This recipe requires a 2lb bag of powdered sugar. It’s easiest to use the whole bag instead of measuring it out.
Meringue Powder – we suggest buying a bag of meringue powder to make this part simple. We like the Genie’s Dream Powder, but any brand will work. You’ll add this to your powdered sugar and mix together in your mixer until you can no longer see the yellow of the powder.
Warm Water – You’ll want to use some warm water at this step to help activate your meringue powder. It doesn’t need to be boiling hot. Just warm tap water will work. You’ll notice that as it mixes, it will become the texture of toothpaste. How much water you add depends on how stiff you prefer your icing to be. Just remember to add water slowly as you go, as you want to avoid adding too much.
Corn Syrup – This is another trick we think really helps with the final results. Adding light corn syrup to the mix at this point will help your royal icing have less of a tough bite and more of a shiny finish.
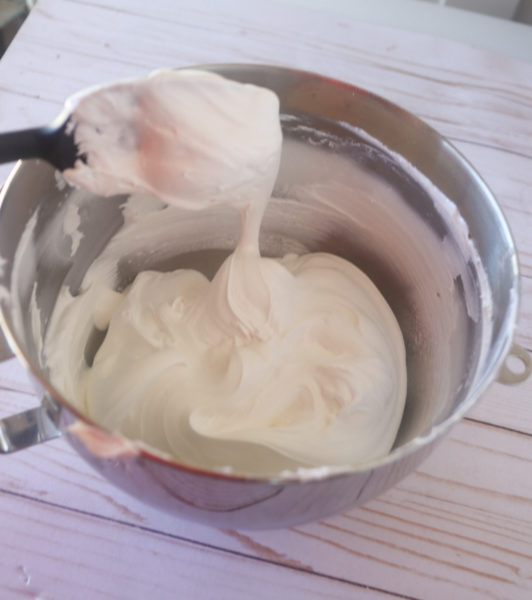 Vanilla – This step is optional, but we recommend adding more vanilla to the icing to get that extra flavor. However, you could leave this out or get creative and add something here, like lemon zest.
White Gel Food Coloring – Once you start mixing up your icing, it’s a great time to add a few squirts of white gel food coloring. This will help make your icing extra white and keep your colors from bleeding. This is another optional step but one we recommend.
You’ll then kick up the speed on your mixer to about a level 4-6 depending on its strength, and you’ll want to let that mix up for about 4-5 mins. This will allow the meringue powder to activate, and the icing will become lighter in color, stiffer, and will whip into something beautiful.
Once your icing is thoroughly mixed, you’ll want to keep it from drying out by covering it with a damp paper towel until you’re ready to mix the colors.
Dying your icing
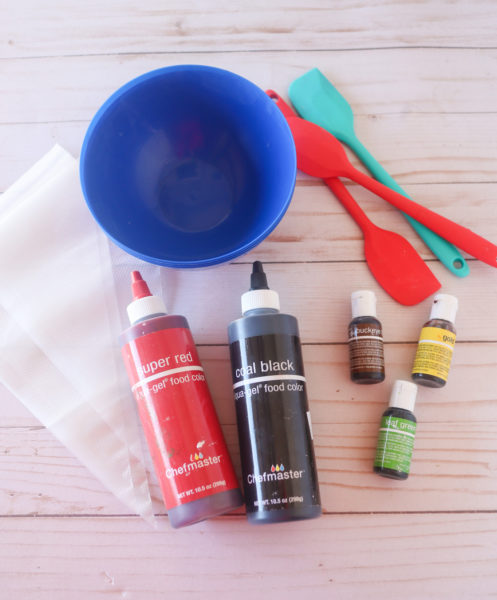 We suggest grabbing some good quality gel food colorings from your local restaurant store, cookie/cake shop, or online. We grabbed some cheap plastic bowls and spatulas from the dollar store for this step to help keep the colors separate. The trick to making royal icing for cookies is going to be mixing it to a good consistency. To achieve this, you’ll want to add your gel coloring first to get your color mixed to your liking, then slowly add water to your icing and stir, stir, stir.
Your goal for the icing is to get a density that is stiff enough not to run over the edge of your cookie but thin enough to settle on its own after a few seconds. This will take practice to see what works best for you. As a beginner, we recommend using one ‘flood-like’ consistency but use two different piping bags. Place your piping bag inside a glass to hold it open, and add your icing. On one bag, you’ll cut a super small tip so you can use that to outline. You’ll cut a bigger tip on another bag to ‘flood’ your cookies.
Rest assured, you can ALWAYS try again when icing your cookies, and practice makes perfect. If your icing is too thin, you can add more plain powdered sugar; if it’s too thick, you can add more water. Just go slowly. Check out this blog for tips on icing consistencies if you’re having trouble.
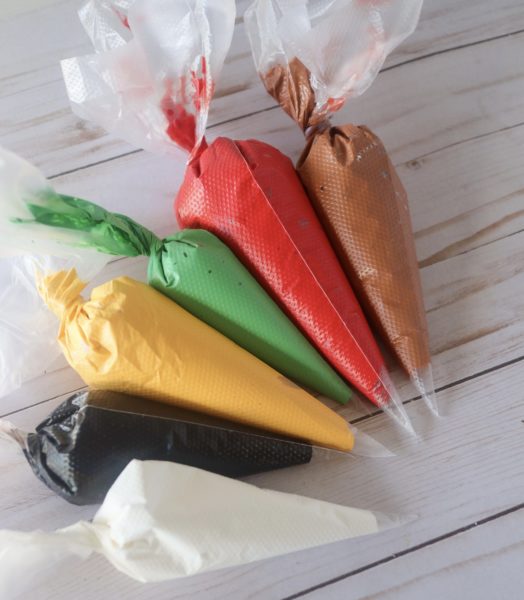 For this set, we used all round cookies and six different colors. This is where you can let your imagination go wild. Make as many or as few colors as you like. We outlined and then flooded cookies with white, brown, green, and gold.
While the icing is wet, you can add more colors for a wet-on-wet technique, which we did with the tree design and the cheeks on the gingerbread face.
Once those were all dry, we came back in and layered on the final touches. We added icing sugar to the wet lines of the snowflake for a snowy, sparkly look. The trick here is to keep things simple. And if you feel like you messed one up, you can scrape it all off and try again.
Pro Tip: You can visit your local cake supply store, restaurant store, or grocery store to see if they sell pre-made icing in buckets. You can buy some already-made royal icing or buttercream and go from there. Let your creativity guide you. These cookies will need to sit overnight to set and dry completely. We suggest packaging them up only after the designs have hardened.

These festive cookies serve as delectable treats and an edible expression of love and creativity, making the holidays even more special and memorable. May your home be brimming with laughter, love, and the delightful smell of sugar cookies this holiday season. At Homestead, we hope that by sharing recipes like this, we can help you turn your house into a warm and loving home. Whether you’re embarking on the journey of purchasing your first home, expanding as your family grows, considering a refinance, or just looking for some cherished recipes, we’re committed to assisting you every step of the way.
Easy Sugar Cookies & Royal Icing
Ingredients
- 4 cups flour, sifted
- 1/3 cup corn starch
- ¾ tsp salt
- 1 cup (2 sticks) unsalted butter
- 1 cup sugar
- 2 eggs
- 1 tsp vanilla extract
- 2 lbs. powdered sugar
- 1/3 cup meringue powder
- ½ cup warm water + extra for mixing colors/consistencies
- 2 tbsp light corn syrup
- White Gel Food Coloring (opt)
- Piping Bags
Dough Instructions
- Sift flour and combine with cornstarch and salt. Set aside.
- Heat oven to 375°F.
- Cube cold butter and mix with the sugar till combined – add eggs and flavorings.
- Add flour mixture. Mix until the dough pulls away from the side of the mixing bowl.
- Roll dough out on floured parchment paper to ¼ inch thickness and cut out your shapes. Take away extra scraps to re-roll for more cookies.
- Place on cookie sheets lined with silicone mats.
- Bake for 11-12 minutes on the middle oven rack.
- Remove from oven, transfer to a cooling rack, and let cool.
Icing Instructions
- Dump powdered sugar in a mixer.
- Add meringue powder to the powdered sugar and mix together until you can no longer see the yellow of the powder.
- Add warm water to the mixer on a low-medium setting until it’s about the consistency of toothpaste.
- Add corn syrup, flavoring, and white gel food coloring.
- Mix on a medium-high speed (level 4-6) for 4-5 minutes until the icing has turned completely white and has whipped into a nice thick, fluffy texture.
- Add to bowls with food coloring and mix with water to get the consistency desired to ice your cookies.
- Let dry at room temperature overnight to harden and set completely.
- Share and enjoy!